
Your first manual flow
Build a three-step checkout review, save its design, execute it, and submit a run. Use a safe test application; the example describes behavior rather than providing a real payment integration.
1. Open and name the flow
Run npx flowstride open. In Workspace, use the flow selector and plus button to create a flow. Give it a specific name such as Checkout — registered customer.
Set a version such as 1.0, a Test Plan identifier such as TP-CHECKOUT-01, and the intended environment. These labels describe the test record; they do not change which application a human tester opens.
2. Create three steps
Choose Step and place three nodes on the canvas. Select each node and fill in its properties:
| Step | Action instructions | Observable expected result |
|---|---|---|
| Open the prepared cart | Sign in with the test customer and open the cart containing one stocked item | The expected item, quantity and total appear |
| Submit the order | Enter the approved test address and submit once | Exactly one confirmation appears with an order ID |
| Verify the recorded order | Open the customer's order history | The same order ID, item, quantity and total are present |
Use Group for a boundary such as Checkout, and Text for the preconditions or cleanup note. Step details explains how to write unambiguous cases.
3. Connect the path
Use Arrow to connect the first node to the second, then the second to the third. Keep one outgoing connection per step and no cycles.
The runtime starts with the lowest internal node ID and follows outgoing connections. Moving nodes or changing their displayed step labels does not redefine this order. Confirm that the highlighted first step and arrow path match the journey you intend.
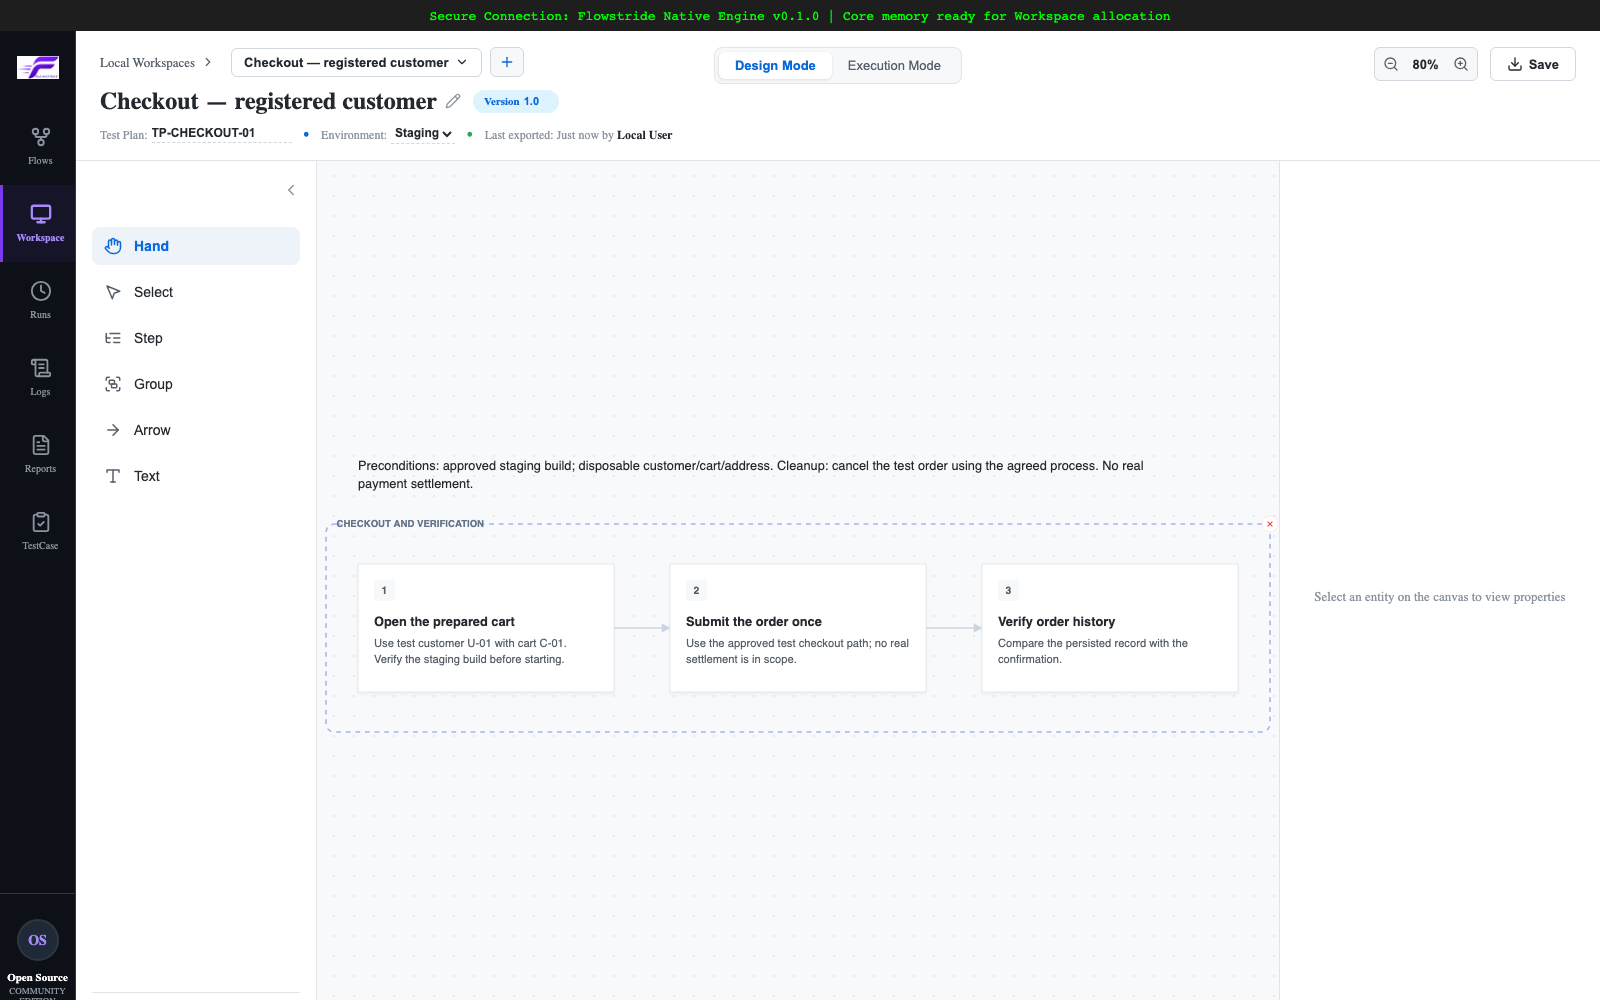
The example design in the FS Manual Workspace. Open the image to inspect the controls.
4. Save the design
Click Save in Design Mode and wait for confirmation. The project server saves the template under manual_flows/templates.
Use the saved project template and media folders for a complete backup. The FS toolbar includes a separate browser-export path, but it depends on the hosting engine bridge; do not rely on a download as proof of a saved template or submitted run.
5. Execute and submit
Switch to Execution Mode. The design is saved before this transition. Perform the first action in your application, return focus to the workspace canvas, and press Enter to mark it Passed. Repeat for the connected steps.
For a real mismatch, use Delete/Backspace for Failed, Tab for Blocked, or Escape for Skipped. These are execution shortcuts; they have different meanings in Design Mode.
Add a defect and evidence when needed, save the defect form, then click Save in FS / Submit Run in Cloud mode. The run goes into manual_flows/runs, separate from the template. Execution details covers partial runs and status meaning.
6. Reopen the record
Open Runs, search by name/date, and select the record. Review the saved steps and evidence. A historical run is a review record; start from the design for a fresh test.
Start from a supplied design
Download the example design. Copy it into your project's manual_flows/templates/ as manual-checkout.json, then reopen the workspace or refresh its template list. This is a local template file, not an automated .flow script.
The example deliberately includes preconditions, three connected steps and a cleanup note. Adapt the expected results to your own product before treating it as a real test.